From this tutorial you will learn how to mount an Amazon S3 Bucket as a Network Drive under Windows
(or how to map an S3 Bucket as a Windows Drive).
First of all you need to download and
install TntDrive.
The following window appears when you start TntDrive:
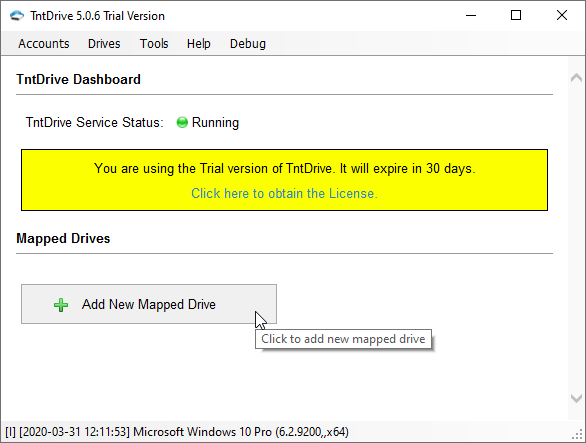
TntDrive Dashboard - displays all mapped drives and lets you add new mapped drives
This is the main application window, it shows all mapped drives and lets you add new mapped drives or edit existing drives.
To Add new Mapped Drive
Click Add New Mapped Drive, corresponding dialog will open:
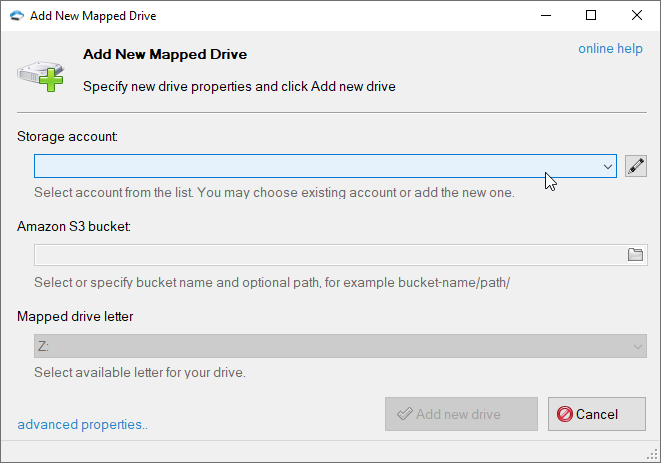
Add New Mapped Drive dialog
1. Choose the storage account
TntDrive supports various storage types,
please choose the storage account you want to work with.
If you adding the first drive, you need to add the storage account first.
2. Select an Amazon S3 Bucket to map
Click on the folder icon to get buckets list from the storage and choose desired bucket and optional path.
You may also enter the bucket name and path manually.

Select Amazon S3 Bucket and optional directory/subdirectory
If you do not have any buckets on your account or need to create the new one, just
type the bucket name in the corresponding text-box and it will be created automatically.
You may also specify optional directory/subdirectory after the bucket name
Special note for IAM users: if you do not have permissions to get buckets list or
create new buckets, you need to enter existing bucket name.
3. Specify Mapped Drive Letter
This letter will be assigned to the mapped drive.

Select the letter that will be assigned to new mapped drive
4. Click Add new drive

Click the Add new drive button
Your Amazon S3 bucket will appear in My Computer
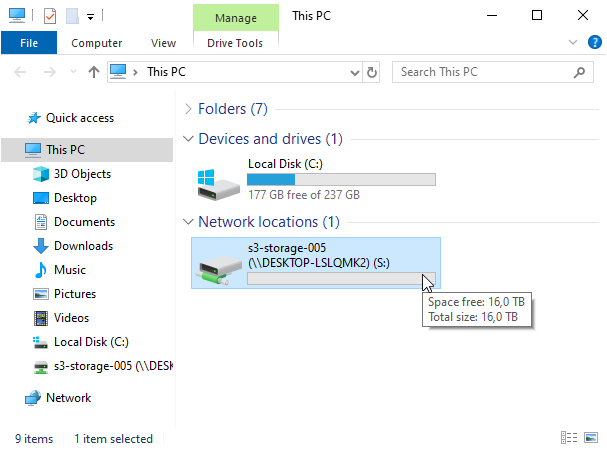
Amazon S3 bucket appears in My Computer as a mapped drive
Additional Drive Properties
You may also specify additional drive properties when adding new drive or editing existing one.
Click the Advanced properties link located at the bottom left corner of the dialog.

Click the advanced properties link to adit additional drive properties
Mapped Drive
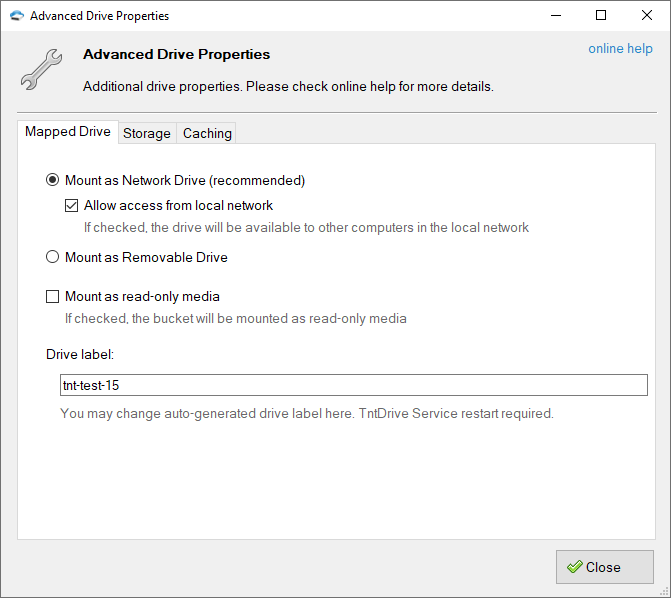
Additional Properties dialog - Mapped Drive tab
Mount as network drive - mapped drive will appear as a network mounted drive and it will also be
available to other computers in your local network.
Allow access from local network - turn this option on if you would like to make mapped drive visible over the local network.
Mount as removable drive - mapped drive will appear as a removable drive and it will be visible only
to users of the local system.
There are some differences of how Windows handle network drives and removable drives.
It sends less requests to network drive. Windows is also more tolerant to delays when network drive is used.
So, the Network Drive type is recommended.
Mount as read-only media - mount Amazon S3 Bucket in a read-only mode.
Drive label - you may change auto-generated drive label. TntDrive Servie restart required if you change this setting.
Storage
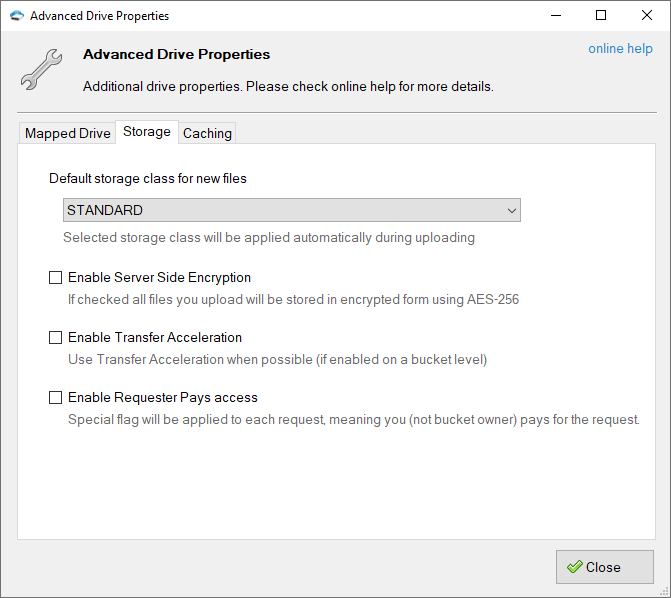
Additional Properties dialog - Amazon S3 tab
Default Storage Class - allows you to select which storage class will be automatically applied to files you upload via TntDrive.
The following storage types are supported for now:
-
STANDARD - Standard storage class.
-
STANDARD_IA - Standard Infrequent Access storage class (cheaper than Standard but has some limitations, see AWS website for more details).
-
ONEZONE_IA - S3 One Zone-IA (Infrequent Access) Storage Class (designed to be used to store data that does not need the extra level of protection provided by geographic redundancy)
-
GLACIER - cold storage class for data that will be stored for decades without the need to access.
You pay when you need to access your data
(check out the pricing for more details)
-
DEEP_ARCHIVE - cold storage class for data that will be stored for decades without the need to access.
You pay when you need to access your data
(check out the pricing for more details)
-
INTELLIGENT_TIERING - storage class designed for customers who want to optimize storage
costs automatically when data access patterns change, without performance impact or operational overhead.
Amazon S3 monitors access patterns of the objects in S3 Intelligent-Tiering, and moves the ones that have
not been accessed for 30 consecutive days to the infrequent access tier. If an object in the infrequent access
tier is accessed, it is automatically moved back to the frequent access tier. Additional charges may apply,
please check pricing for more details.
Enable Server Side Encryption - an Amazon S3 feature that allows you to
store files on Amazon S3 in encrypted form using AES-256 encryption. Files decrypted
automatically when you download them. Encryption keys are securely stored and managed by Amazon S3.
Enable Transfer Acceleration - an Amazon S3 feature that allows you to upload
your files up to the 500% faster, based on the distributed AWS edge network.
Click here to learn more
about this feature and how to enable it on a bucket level. If this option is enabled and Transfer Acceleration is
enabled on a bucket level, TntDrive will use accelerated endpoint to upload your files.
Caching
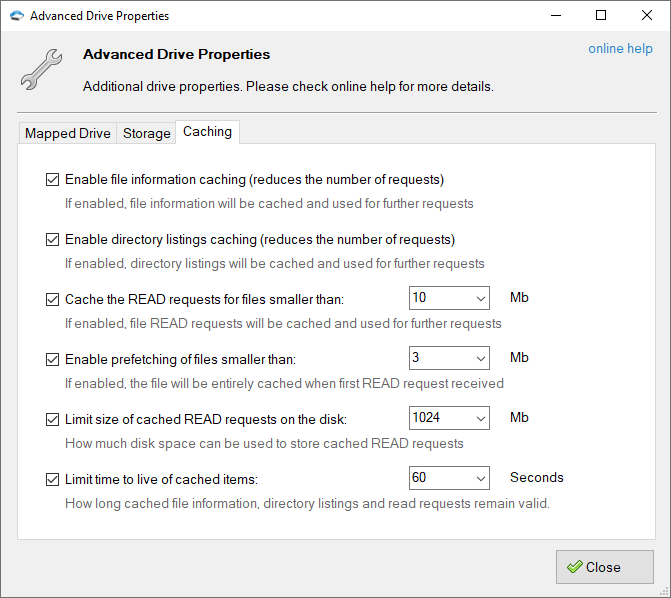
Additional Properties dialog - Caching tab
Enable file information caching - if enabled, file information will be cached in memory
and used for further requests. Using this option you can reduce the number of requests sent to the server.
You may need to disable this option when working with the same files from multiple locations.
Cached file information is valid for the period specified by the
Limit time to live of cached items option described below.
Enable directory listing caching - if enabled, directory listings will be cached in memory
and used for further requests. Using this option you can reduce the number of requests sent to the server.
You may need to disable this option when working with the same directories from multiple locations.
Cached directory listings are valid for the period specified by the
Limit time to live of cached items option described below.
Cache the READ requests for files smaller than: XX Mb - if enabled, TntDrive will cache
portions of files requested by the calling application, for subsequent requests of the same block the cached
copy will be returned. By specifying XX Mb you may set the max file size to cache the requests for.
Local disk is used to keep the cached data. You may configure cache location in Tools, Options, Advanced.
Cached file blocks are valid for the period specified by the
Limit time to live of cached items option described below.
Enable prefetching of files smaller than: XX Mb - if enabled, TntDrive will download and cache the entire
file when the first READ request received. Cached file will be used for all further READ requests.
By specifying XX Mb you may set the max file size to prefetch.
Local disk is used to keep the file. You may configure cache location in Tools, Options, Advanced.
Cached file is valid for the period specified by the
Limit time to live of cached items option described below.
Limit size of cached READ requests on the disk: XX Mb - this option lets you limit the disk
space used by cached READ requests and prefetched files, by specifying XX Mb you may set the
max allowed cache size.
Limit time to live of cached items: XX Seconds - specifies how long the cached data remain valid.
If the time interval between the time the item was cached and current time is greater than XX Seconds
fresh copy will be requested from the server.
Please note that TntDrive does not update the cache if file/directory was changed outside of the mapped drive.
You may use the following command to reset the cache manually: Drives - [Drive] - Reset Cache..
You may also reset the cache from command line interface.
